This section mainly introduces some common operations related to the Excel object model, including obtaining the current path of a file, referencing objects, specifying constant values for parameters, expanding cell ranges, and modifying attributes of cell ranges.
Obtaining the Current Path of a File
Section 4.2 introduced opening an Excel file at a specified path using the open method of the workbook object. Often, we hope this path is the current path of the workbook file or the .py file. The following methods can be used to obtain the current path of a file.
【Excel VBA】
In Excel VBA, use the Path property of the ThisWorkbook object to obtain the current path of the workbook file. Below, open an Excel file and save it to drive D with the name and format test.xlsm. Open the Excel VBA programming interface, add a module, and input the following code in the code editor. The sample file path is Samples\ch04\Excel VBA\CurrentPath.xlsm.
Sub Test()
    Debug.Print ThisWorkbook.Path
End Sub
Run the procedure, and the file path will be output in the Immediate Window.
【Python xlwings】
In Python, to obtain the current path of a .py file, you need to import the os package and use its getcwd method to get the current path of the .py file. Assume the following is part of the code in a .py file: use the getcwd method of the os package to obtain the path of the .py file, and use the open method of the workbook object to open the Excel data file under this path, returning a workbook object. The sample file path is Samples\ch04\Python\CurrentPath.py.
class="text-secondary">import xlwings class="text-secondary">as xw   # Import the xlwings package
class="text-secondary">import os               # Import the os package
root = os.getcwd()     # Obtain the current path of the .py file
# Create an Excel application (visible, no workbook added)
app = xw.App(visible=True, add_book=False)
# Open the data file (writable)
bk = app.books.open(fullname=root + r'\Test.xlsx', read_only=False)
sht1 = bk.sheets(1)    # Obtain the first worksheet
print(sht1.name)       # Output the name of the first worksheet
bk.close()             # Close bk
app.quit()             # Exit the application
Run the script to open the Excel file Test.xlsx in the current path and output the name of the first worksheet in the workbook.
Referencing Objects
Before operating on an object, you need to find the object—the process of finding the object is called object referencing. Section 4.2 mentioned that all Workbook (book) objects created in Excel are saved in the Workbooks (books) collection, and all Worksheet (sheet) objects are saved in the Worksheets (sheets) collection. When you need to obtain a specific object from the collection, you must first extract it from the collection. There are two methods for extraction: one is to use an index number (each object has a unique index number when added to the collection), and the other is to use the object name. The sample file path for Excel VBA code examples is Samples\ch04\Excel VBA\ObjectReference.xlsm.
You can reference workbooks using index numbers and names.
【Excel VBA】
Set bk = Workbooks(1)
Set bk = Workbooks("Workbook1")
【Python xlwings】
>>> bk = app.books[0]
>>> bk = app.books(1)
>>> bk = app.books['Workbook1']
You can reference worksheets using index numbers and names.
【Excel VBA】
Set sht = Worksheets(1)
Set sht = Worksheets("Sheet1")
【Python xlwings】
>>> sht = bk.sheets[0]
>>> sht = bk.sheets(1)
>>> sht = bk.sheets('Sheet1')
Referencing a cell requires specifying the row and column coordinates of the corresponding cell.
【Excel VBA】
sht.Range("A1").Select
sht.Cells(1, "A").Select
sht.Cells(1, 1).Select
【Python xlwings】
>>> sht.range('A1').select()
>>> sht.range(1, 1).select()
>>> sht['A1'].select()
>>> sht.cells(1, 1).select()
>>> sht.cells(1, 'A').select()
Referencing a cell range requires specifying the coordinates of the top-left cell and the bottom-right cell of the range.
【Excel VBA】
sht.Range("A3:C8").Select
sht.Range("A3", "C8").Select
sht.Range(sht.Range("A3"), sht.Range("C8")).Select
sht.Range(sht.Cells(3, 1), sht.Cells(8, 3)).Select
【Python xlwings】
>>> sht.range('A3:C8').select()
>>> sht.range('A3', 'C8').select()
>>> sht.range(sht.cells(3, 1), sht.cells(8, 3)).select()
>>> sht.range((3, 1), (8, 3)).select()
There are many special cases for referencing cells and cell ranges; for details, please refer to Chapter 13.
Obtaining the Last Row Number: Specifying Constant Values for Parameters
When reading data from an Excel worksheet, it is often necessary to obtain the row number of the last row of the data range. The last row of the data range in this example is shown as the selected row in Figure 4-4. There are two methods to reference the last row: one is to look from top to bottom (the last row of the data range is the last non-empty row); the other is to look from the bottom of the worksheet upward (the row of the first non-empty cell encountered in the specified column). Here, we need to use the End method of the cell object.
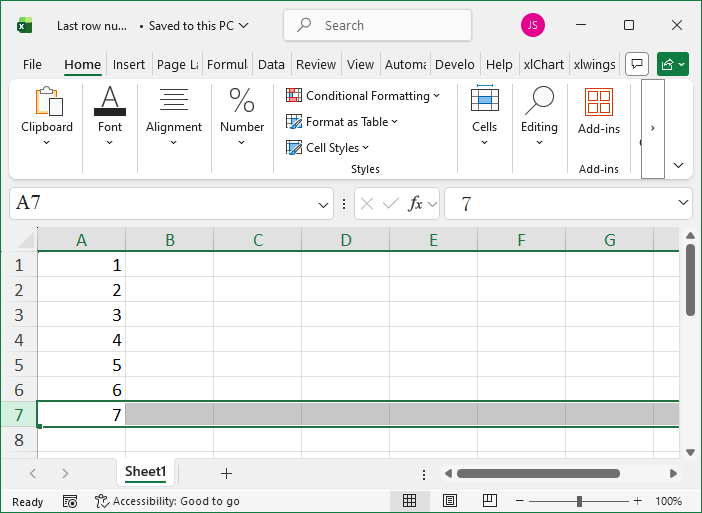
Figure 4-4 Last Row of the Data Range
The code for referencing the last row in both cases using Excel VBA and Python xlwings is shown below. All statements have the same effect. Note the difference in setting constant values for parameters in the End method. The sample file path for Excel VBA code examples is Samples\ch04\Excel VBA\LastRowNumber.xlsm.
【Excel VBA】
intR = sht.Range("A1").End(xlDown).Row
intR = sht.Cells(1, 1).End(xlDown).Row
intR = sht.Range("A" & CStr(sht.Rows.Count)).End(xlUp).Row
intR = sht.Cells(sht.Rows.Count, 1).End(xlUp).Row
【Python xlwings】
>>> sht.range('A1').end('down').row
>>> sht.cells(1, 1).end('down').row
>>> sht.range('A' + str(sht.api.Rows.Count)).end('up').row
>>> sht.cells(sht.api.Rows.Count, 1).end('up').row
>>> sht.api.Range('A1').End(xw.constants.Direction.xlDown).Row
>>> sht.api.Cells(1, 1).End(xw.constants.Direction.xlDown).Row
>>> sht.api.Range('A' + str(sht.api.Rows.Count)).End(xw.constants.Direction.xlUp).Row
>>> sht.api.Cells(sht.api.Rows.Count, 1).End(xw.constants.Direction.xlUp).Row
Expanding Cell Ranges
When writing data to a worksheet, it is often necessary to expand cells to row ranges, column ranges, or multi-row multi-column ranges. You can use the Resize method of the cell object to expand.
The following example demonstrates expanding the specified cell C2 in three directions (up/down, left/right, and rows/columns) to get a new range and select them. The sample file path for Excel VBA code examples is Samples\ch04\Excel VBA\ExpandCellRange.xlsm.
【Excel VBA】
sht.Range("C2").Resize(3).Select    ' C2:C4, single column
sht.Range("C2").Resize(1, 3).Select  ' C2:E2, single row
sht.Range("C2").Resize(3, 3).Select  ' C2:E4, multi-row multi-column
【Python xlwings】
>>> sht.range('C2').resize(3).select()    # C2:C4, single column
>>> sht.range('C2').resize(1, 3).select()  # C2:E2, single row
>>> sht.range('C2').resize(3, 3).select()  # C2:E4, multi-row multi-column
Modifying Attributes of Cell Ranges
Using Excel VBA and Python xlwings, you can modify attributes of cell ranges, such as background color, font size, and style. Below, set the background color of cell A2 to green, the font size to 20, bold, and italic. The sample file path for Excel VBA code examples is Samples\ch04\Excel VBA\ModifyCellRangeAttributes.xlsm.
【Excel VBA】
sht.Range("A2").Interior.Color = RGB(0, 255, 0)
sht.Range("A2").Font.Size = 20
sht.Range("A2").Font.Bold = True
sht.Range("A2").Font.Italic = True
【Python xlwings】
>>> sht.range('A2').color = (0, 255, 0)
>>> sht.api.Range('A2').Font.Size = 20
>>> sht.api.Range('A2').Font.Bold = True
>>> sht.api.Range('A2').Font.Italic = True