This section introduces adding pictures and geometric transformations of pictures.
Adding Pictures
Pictures can be added to an existing file using the AddPicture method of the Shapes object. The AddPicture method returns a Shape object representing the new picture. Its syntax is as follows:
sht.api.Shapes.AddPicture(FileName, LinkToFile, SaveWithDocument, Left, Top, Width, Height)Here, sht is the worksheet. The parameters of the AddPicture method are listed in Table 5-13.
Table 5-13 Parameters of the AddPicture Method
| Name | Required/Optional | Data Type | Description |
|---|---|---|---|
| FileName | Required | String | Path of the picture file |
| LinkToFile | Required | msoTriState | When False, the picture becomes an independent copy of the file(no link); when True, the picture is linked to the file from which it was created. |
| SaveWithDocument | Required | msoTriState | Save the picture with the document. When False, only link information is stored in the document; when True, the linked picture is saved with the inserted document. If LinkToFile is False, this parameter must be True. |
| Left | Required | Single | Position of the top-left corner of the picture relative to the top-left corner of the document (in points) |
| Top | Required | Single | Position of the top-left corner of the picture relative to the top of the document (in points) |
| Width | Required | Single | Width of the picture (in points; enter -1 to retain the original width of the file) |
| Height | Required | Single | Height of the picture (in points; enter -1 to retain the original height of the file) |
Below is an example of adding a picture to worksheet sht, where the picture is linked to the file from which it was created and saved with worksheet sht.
【Excel VBA】 The sample file path is: Samples\ch17\Excel VBA\Pictures.xlsm.
Sub Test()
    ActiveSheet.Shapes.AddPicture "D:\picpy.jpg", True, True, 100, 50, 100, 100
End Sub
Running this procedure generates the picture shown in Figure 5-23.
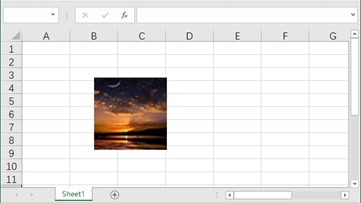
Figure 5-23
【Python】 Enter the following in the Python Shell:
>>> sht.api.Shapes.AddPicture(r'D:\picpy.jpg', True, True, 100, 50, 100, 100)The generated picture is shown in Figure 5-23.
Geometric Transformations of Pictures
Section 5.2 introduced shape transformations. Using methods provided by the Shape object, geometric transformations such as translation, rotation, scaling, and symmetry can be applied to given shapes. In terms of implementation, geometric transformations of pictures are exactly the same as those of shapes.
Below is an example of creating a picture from a specified file and performing consecutive rotation and horizontal symmetry transformations.
【Excel VBA】 The sample file path is: Samples\ch17\Excel VBA\Geometric Transformations of Pictures.xlsm.
Sub Test()
    Dim shp As Shape
    Set shp = ActiveSheet.Shapes.AddPicture("D:\picpy.jpg", _
        True, True, 100, 50, 100, 100)
    shp.IncrementRotation 30   ' Rotate 30° clockwise around the center
    shp.Flip 0                 ' Horizontal flip
End Sub
Running this procedure generates the picture and applies geometric transformations.
【Python】 Enter the following in the Python Shell:
>>> shp = sht.api.Shapes.AddPicture(r'D:\picpy.jpg', True, True, 100, 50, 100, 100)
>>> shp.IncrementRotation(30)   # Rotate 30° clockwise around the center
>>> shp.Flip(0)                 # Horizontal flip
The picture after rotation and symmetry transformations is shown in Figures 5-24 and 5-25. Note that the symmetry transformation is applied to the result of the previous rotation, not the original picture.
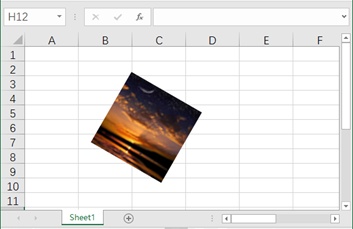
Figure 5-24
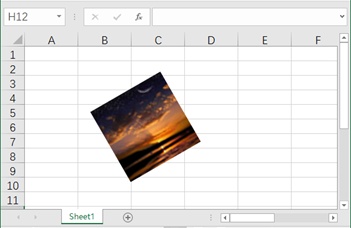
Figure 5-25